
No-Bake Cookie Lasagna

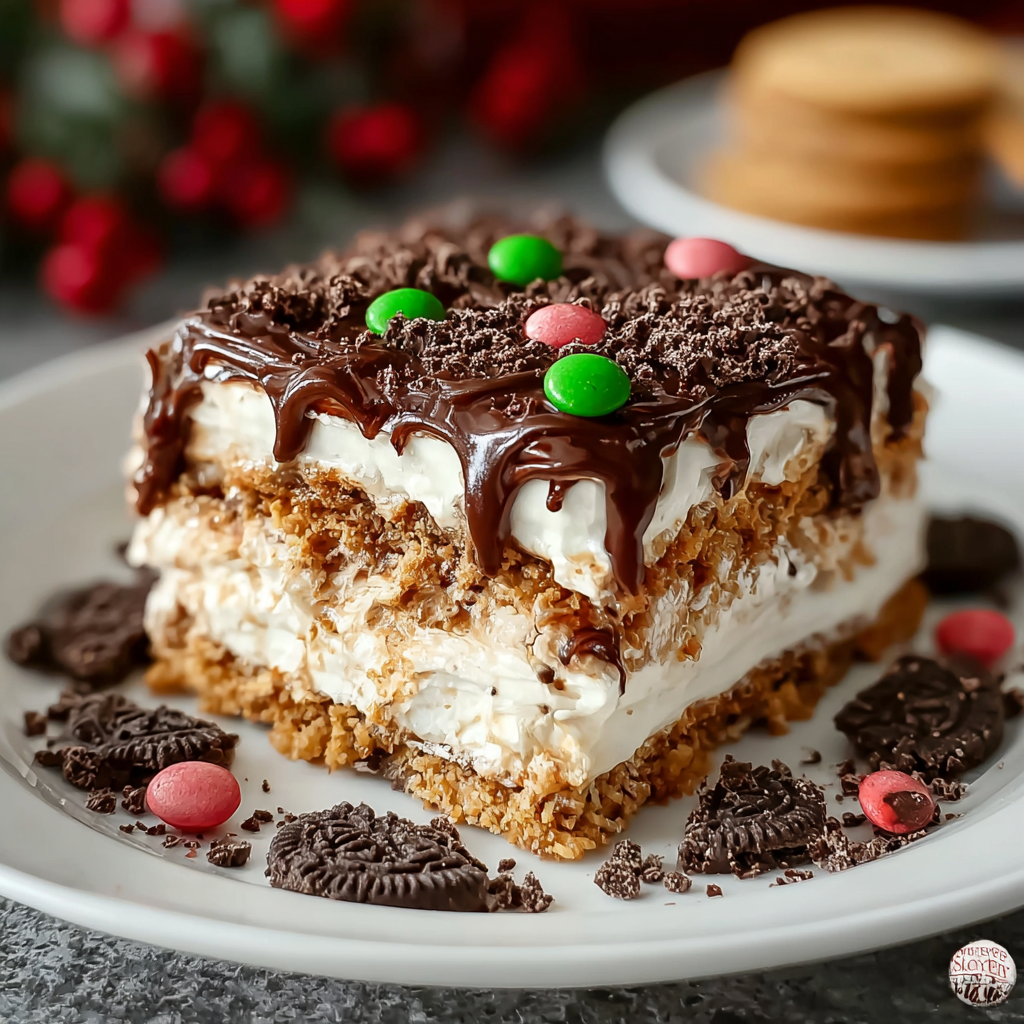
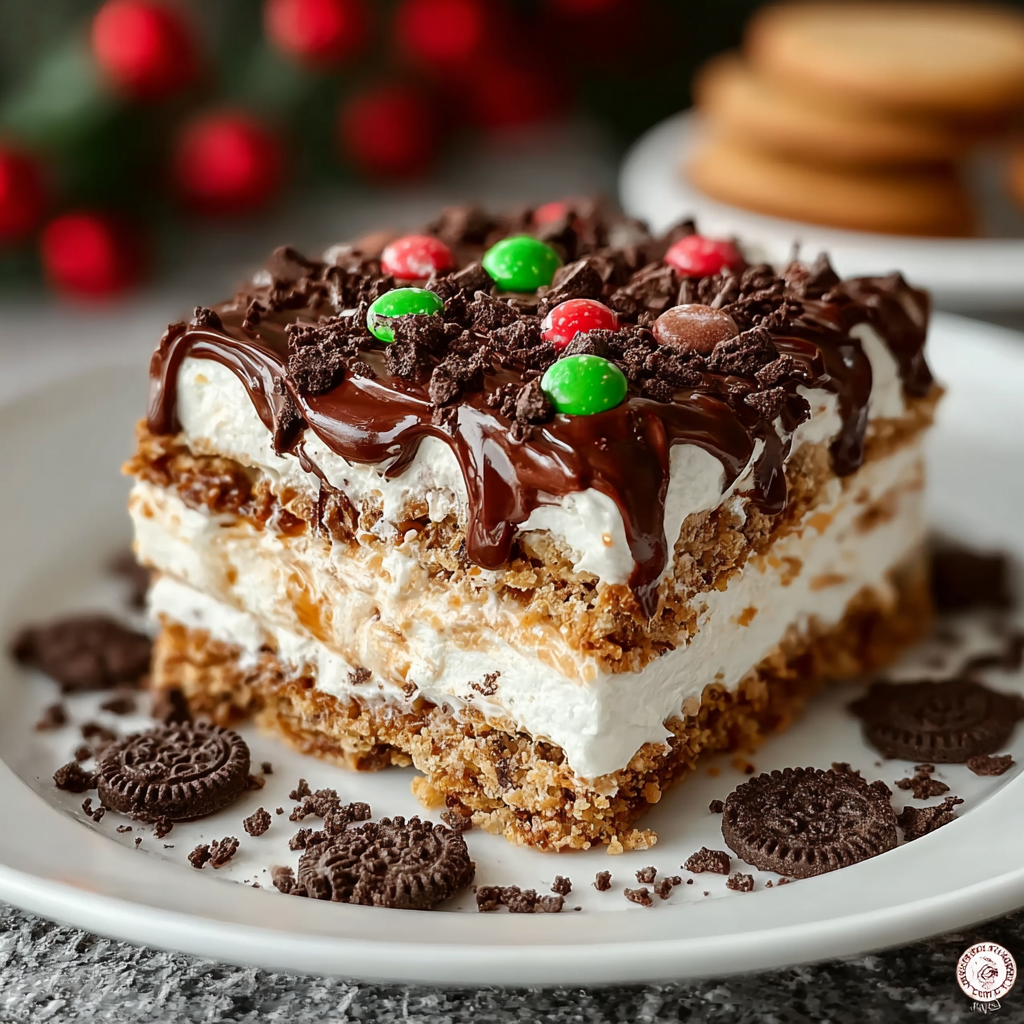
A festive, no-bake layered dessert with a crunchy Oreo base, creamy cheesecake layer, chocolate and vanilla pudding layers, and a cloud of whipped topping — perfect for holiday gatherings.
This No-Bake Cookie Lasagna is one of those joyful desserts that shows up at holiday parties, potlucks, and family gatherings with more fanfare than its humble preparation deserves. I first discovered this layered treat at a church holiday bake sale when I was a teenager — the first forkful combined crunchy cookie, tangy cream cheese, silky chocolate, and soft vanilla in a way that made me promise myself I would learn to recreate it. Over the years I’ve adjusted the ratios and added festive candies and sprinkles for a seasonal sparkle. It’s rich without being heavy, light in texture thanks to whipped topping, and entirely forgiving for cooks of any skill level.
What makes this particularly special is how the layers play together: a sturdy Oreo crust provides contrast to a tangy-smooth cream cheese layer, which in turn supports two puddings layered distinctly so each bite delivers chocolate and vanilla. It’s easy to assemble in under an hour of active time, then transformed by chilling. I keep a dedicated 9x13 pan just for no-bake desserts, and this recipe has become my go-to for quick celebrations because guests always ask where I bought it — the homemade version simply tastes better.
Why You'll Love This Recipe
- This is a no-oven dessert that’s ready to assemble in about 30 minutes of active time and is ideal when your oven is busy with a roast or cookies.
- Uses pantry staples and store-bought instant pudding and whipped topping for speed, but layers like a classic bakery dessert for party presentation.
- Scales easily: make in a 9x13-inch pan for a crowd or halve for a smaller tray; keeps well refrigerated making it perfect for make-ahead entertaining.
- Kid-approved and holiday-ready — decorate with seasonal sprinkles and mini candies for a festive look without extra fuss.
- Textural contrast: crisp crushed cookies, creamy cheesecake layer, and smooth pudding make every bite interesting and crowd-pleasing.
- Flexible for substitutions: try different cookie bases or flavored puddings to suit your taste or dietary needs.
I’ve served this to tolerant in-laws, picky teenagers, and a kindergarten class — it disappears every time. The first time I added mini candies and colorful sprinkles was for a December celebration; someone joked it looked like a cookie-layered snowfield, and the name stuck in our family. Making it brings back cozy memories of holidays and easy weeknight celebrations alike.
Ingredients
- Crushed Oreo cookies (36 cookies): Use the classic sandwich cookie with filling — crushing finely gives a cohesive crust. You can pulse in a food processor for uniform crumbs or place in a zip-top bag and use a rolling pin.
- Unsalted butter (1/2 cup, melted): The butter binds the crumbs into a pressable base. Unsalted keeps salt levels consistent; if using salted, omit any extra salt elsewhere.
- Cream cheese (8 ounces, softened): Full-fat is best for flavor and stability. Let it sit at room temperature 30 minutes before mixing for a lump-free layer.
- Granulated sugar (1/4 cup): Sweetens the cream cheese layer just enough to balance the tang without overpowering the puddings.
- Milk (2 tablespoons for cream cheese layer; plus 3 cups cold for puddings): Use whole milk for the creamiest texture; skim will work but the mouthfeel is lighter.
- Vanilla extract (1 tsp): Adds warmth and rounds the flavors — choose a pure extract for best results.
- Whipped topping (1 1/2 cups + 1 1/2 cups, divided): Use stabilized whipped topping like Cool Whip or a homemade stabilized whipped cream if you prefer.
- Instant vanilla pudding (3.4 oz box) and instant chocolate pudding (3.4 oz box): Quick and reliable — prepare each with 1 1/2 cups cold milk as instructed for a thick, spoonable consistency.
- Cold milk (3 cups total): Chill before mixing so puddings set to the correct texture quickly.
- Decorations: Christmas sprinkles and mini M&Ms or small holiday candies for color and a festive finish.
Instructions
Prepare the crust: Crush 36 Oreo cookies to a fine crumb using a food processor or a sturdy bag and rolling pin. Combine crumbs with 1/2 cup melted unsalted butter in a medium bowl until the mixture holds together when pressed. Press the mixture firmly into the bottom of a 9x13-inch pan, creating an even layer with your fingers or the back of a flat measuring cup. Chill in the refrigerator 15 minutes to set while you prepare the next layers. Make the cream cheese layer: Beat 8 ounces softened cream cheese with 1/4 cup granulated sugar, 2 tablespoons milk, and 1 teaspoon vanilla extract until smooth and lump-free (use an electric mixer on medium speed for 1–2 minutes). Fold in 1 1/2 cups of whipped topping gently until fully incorporated and light. Spread this mixture evenly over the chilled Oreo crust, smoothing with a spatula to create a level surface. Prepare the puddings: In two separate bowls, whisk each instant pudding mix with 1 1/2 cups cold milk (3 cups total used). Whisk for 2 minutes until just thickened. Let the puddings rest about 2–3 minutes to continue setting; they should be spoonable but thick enough to hold a layer without seeping into the cream cheese layer. Assemble the layers: Spoon or gently spread the chocolate pudding over the cream cheese layer first, creating an even layer without pressing down. Smooth carefully, then spoon the vanilla pudding on top of the chocolate, spreading to the edges. Taking care keeps the layers distinct and visually appealing. Chill briefly between layers if puddings begin to soften. Top and chill: Top the pudding layers with the remaining 1 1/2 cups whipped topping, spreading into a soft cloud. Decorate immediately with Christmas sprinkles and mini M&Ms or holiday candies so they adhere. Refrigerate for at least 4 hours or overnight — overnight is best to allow the crust to soften slightly and flavors to meld. Serve chilled, cutting into squares with a sharp knife dipped in hot water for clean slices.
You Must Know
- This keeps well refrigerated for up to 4 days; the crust will soften over time but the texture remains pleasant.
- Freezes well for up to 3 months if tightly wrapped — thaw overnight in the refrigerator before serving.
- High in dairy and gluten; not suitable for strict dairy-free or gluten-free diets unless substitutions are made.
- Chilling time is crucial: at least 4 hours ensures the puddings and cream cheese layer firm up for neat slices.
My favorite part of this dessert is the way it brings people to the table. I once brought a tray to a neighborhood cookie swap and came home with a full plate returned — empty. The colors and textures invite sampling, and because it’s made in a single pan, it’s the easiest crowd-pleaser to transport and serve. I often make it a day ahead so flavors meld and the slicing is tidy at serving time.
Storage Tips
Store the dessert covered tightly with plastic wrap or in an airtight container in the refrigerator for up to 4 days. For the best appearance, wrap the pan with a layer of plastic directly on the surface to prevent whipped topping from forming a skin. To freeze, cover the pan first with a layer of plastic wrap pressed to the surface, then with heavy-duty foil; freeze for up to 3 months. Thaw overnight in the refrigerator and add fresh sprinkles or candies right before serving to keep decorations bright.
Ingredient Substitutions
If you need to adapt, swap the Oreo crust for gluten-free chocolate sandwich cookies and use a dairy-free whipped topping and pudding mixes labeled dairy-free to make a lactose-friendly version. For a lighter version, substitute low-fat cream cheese and reduced-fat whipped topping, though the texture will be looser. You can also replace one pudding flavor with butterscotch or caramel instant mix for a twist. Remember, pudding mixes set best with cold whole milk; altering milk fat will change firmness.
Serving Suggestions
Serve chilled in neat squares topped with extra mini candies or a dusting of cocoa for adults. Pair with freshly brewed coffee or a holiday spiced tea for balance. For festive occasions, add edible gold or silver sugar pearls and a sprig of fresh mint for contrast. This dessert is great alongside other holiday sweets — offer small plates so guests can sample multiple items without feeling overindulgent.
Cultural Background
Layered, no-bake desserts like this take inspiration from American pudding salads and layered trifles that became popular in mid-20th-century home cooking. They reflect a tradition of combining convenience products, like instant pudding and whipped topping, with classic baking ingredients to create celebratory desserts without extensive oven time. Over time, cooks have personalized these layers with cookies, custards, and candies to suit holidays and family tastes.
Seasonal Adaptations
Adapt the decorations and flavors by season: swap sprinkles and candies for pastel M&Ms in spring, mini candy corn and orange sprinkles for Halloween, or crushed peppermint and red candies for winter holidays. Use pumpkin spice instant pudding in autumn or a lemon pudding for bright summer variations. Small changes to toppings instantly tailor the dessert to the occasion without changing the base process.
Meal Prep Tips
Make the crust and cream cheese layer the day before, cover, and refrigerate. Prepare the puddings and assemble the day you plan to serve so the pudding layers are freshest. When prepping multiple pans, keep finished pans stacked carefully to avoid disturbing the top layer. Use clear labels with date and contents if storing multiple desserts in the fridge for events. Bring chilled pans out 10 minutes before serving for slightly softer texture.
In the end, this layered treat is forgiving, festive, and ideal for sharing. It’s one of those few desserts that looks impressive without demanding complex techniques — a perfect solution when you want homemade magic with minimal fuss. Share it, customize it, and make it part of your next celebration.
Pro Tips
Soften cream cheese to room temperature for a lump-free cream layer; beat until completely smooth.
Press the Oreo crust firmly and chill before adding the cream cheese layer to prevent sinking.
Prepare puddings with cold milk and allow them to rest a few minutes until thickened before layering.
Decorate right after topping to ensure candies stick and colors stay vibrant.
This nourishing no-bake cookie lasagna recipe is sure to be a staple in your kitchen. Enjoy every moist, high protein slice — it is perfect for breakfast or as a wholesome snack any time.
FAQs about Recipes
Can I make this ahead of time?
Yes, prepare and chill overnight for best slicing; chilling allows layers to set and flavors to meld.
How do I slice neat squares?
To get clean slices, run a sharp knife under hot water, dry it, and slice with a single smooth stroke.
Tags
No-Bake Cookie Lasagna
This No-Bake Cookie Lasagna recipe makes perfectly juicy, tender, and flavorful steak every time! Serve with potatoes and a side salad for an unforgettable dinner in under 30 minutes.
Ingredients
Crust
Cream layer
Pudding layers
Topping
Instructions
Prepare crust
Crush 36 Oreo cookies into fine crumbs and mix with 1/2 cup melted unsalted butter; press into a 9x13-inch pan and chill 15 minutes.
Make cream cheese layer
Beat 8 oz softened cream cheese with 1/4 cup sugar, 2 tbsp milk, and 1 tsp vanilla until smooth. Fold in 1 1/2 cups whipped topping and spread evenly over crust.
Prepare puddings
Whisk each 3.4 oz instant pudding box with 1 1/2 cups cold milk separately until thickened; rest 2–3 minutes before using.
Assemble layers
Spread chocolate pudding over the cream cheese layer, then spread vanilla pudding on top of the chocolate layer. Keep layers even and smooth gently.
Top and chill
Top with remaining 1 1/2 cups whipped topping, decorate with sprinkles and candies, and refrigerate at least 4 hours or overnight before slicing.
Last Step: Please leave a rating and comment letting us know how you liked this recipe! This helps our business to thrive and continue providing free, high-quality recipes for you.
Nutrition
Did You Make This?
Leave a comment & rating below or tag
@feedcooks on social media!
Categories:
You might also like...

Marshmallow Rice Krispies Halloween Brains
Turn classic crispy treats into creepily realistic Halloween brains—soft, glossy marshmallow centers bound to Rice Krispies, shaped and painted for maximum spooky impact.

Crock Pot Creamy Chicken Parmesan Soup
A cozy, slow-cooked blend of tender chicken, crushed tomatoes, cream, and Parmesan—this Crock Pot creamy chicken parmesan soup is weeknight comfort made effortless.

Baked Cod in Coconut Lemon Cream Sauce
Delicate baked cod fillets finished in a bright, silky coconut-lemon cream—an easy weeknight centerpiece that feels special enough for guests.
Did You Make This?
Leave a comment & rating below or tag @feedcooks on social media!
Rate This Recipe
Share This Recipe
Enjoyed this recipe? Share it with friends and family, and don't forget to leave a review!
Comments (1)
This recipe looks amazing! Can't wait to try it.
Comments are stored locally in your browser. Server comments are displayed alongside your local comments.

Hi, I'm Lena!
What's Popular

30-Minute Meals!
Join to receive our email series which contains a round-up of some of our quick and easy family favorite recipes.