>>
30-MINUTE MEALS! Get the email series now →


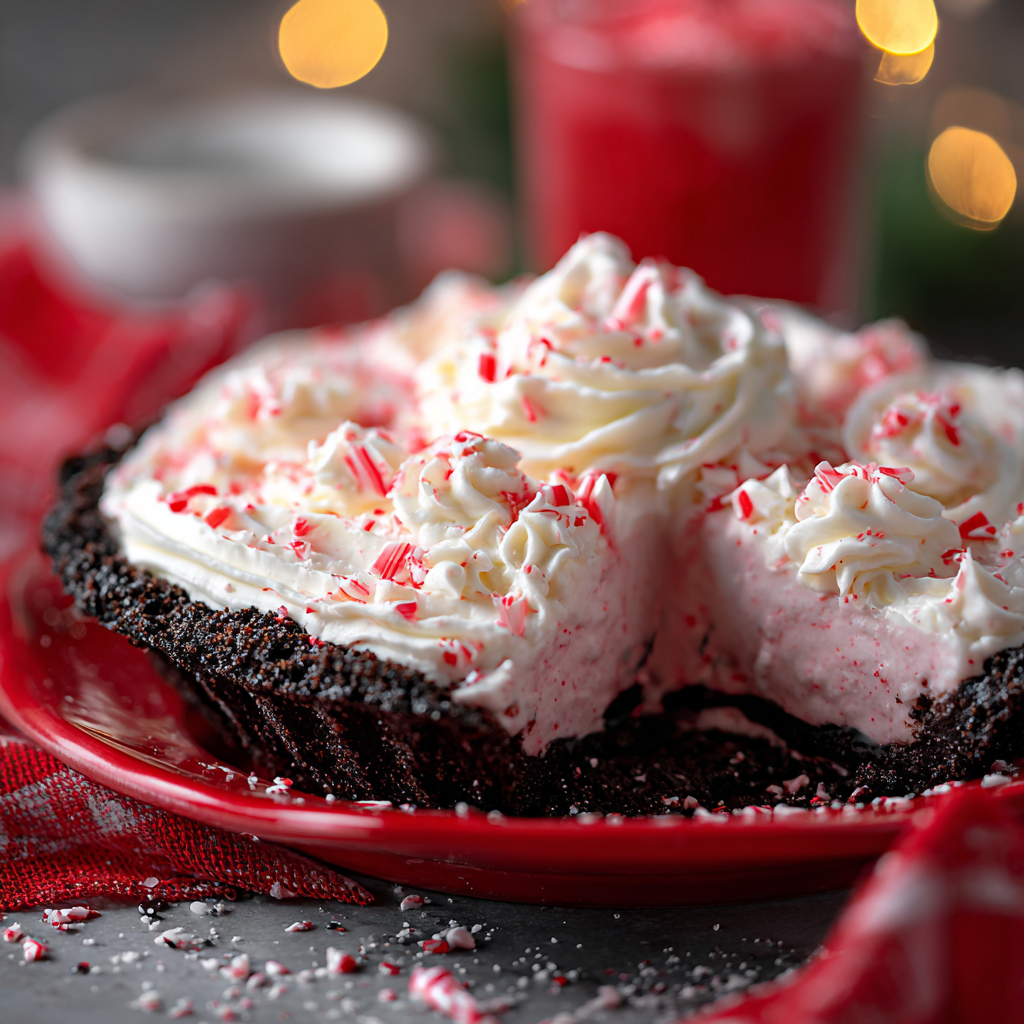
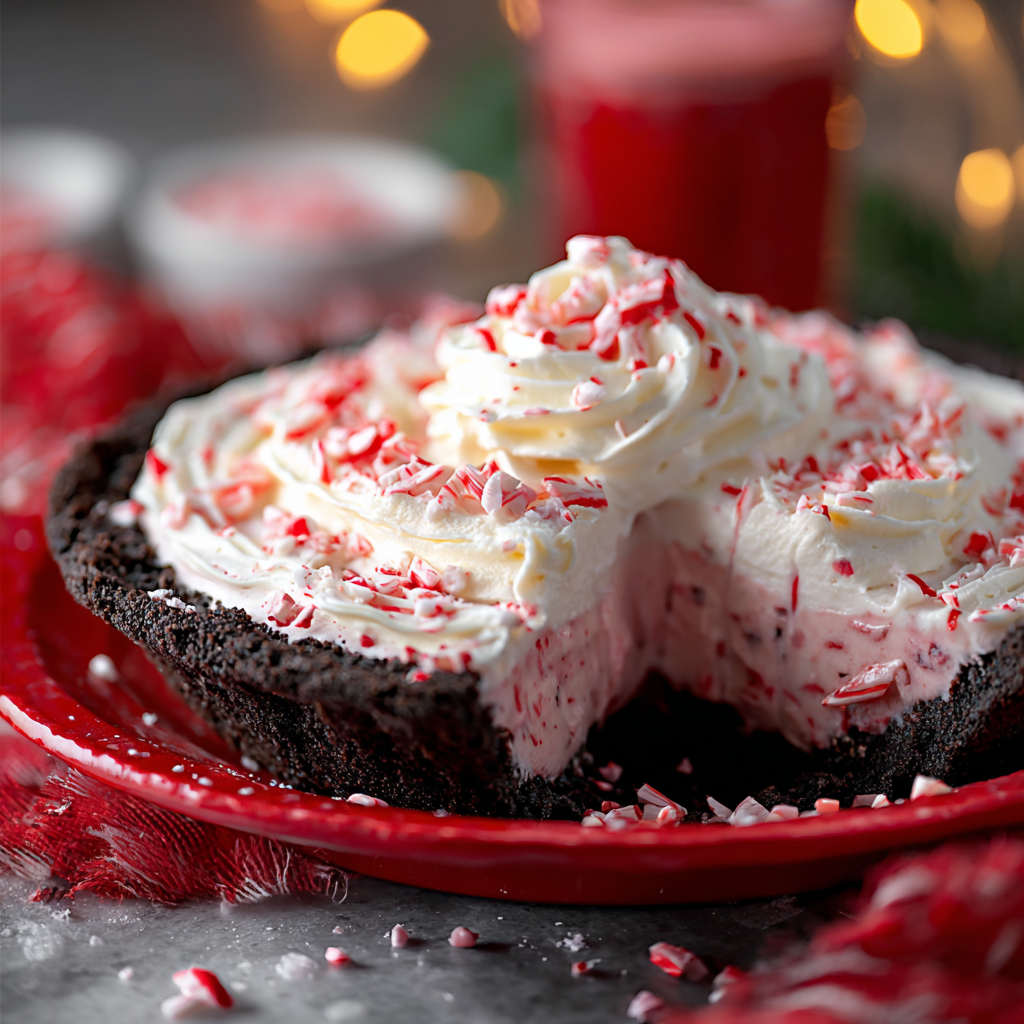
A festive, creamy no-bake peppermint pie with an Oreo crust — bright red swirls, cool peppermint flavor, and an effortless chill-set finish perfect for holiday gatherings.

This no-bake peppermint pie is my go-to for holiday parties and cold-weather dessert cravings. I discovered this combination during a busy December when I needed something showy, quick, and reliably loved by family and friends. The filling settles into a luxuriously smooth, cheesecake-like texture without any baking — just a few minutes mixing, a bit of color, and a long, restful chill in the refrigerator. The result is a silky, minty dessert that slices cleanly and looks like a centerpiece.
I first made this for a family cookie swap and was surprised at how often people asked for the recipe. The flavors are simple but precise: full-fat cream cheese and heavy cream create body and richness; powdered sugar provides sweetness and structure; peppermint extracts and crushed candies deliver the unmistakable holiday bite. The Oreo pie crust adds a pleasing chocolate counterpoint and a little crunch around the edges. It’s the kind of recipe that invites improvisation, but also rewards following the small technical details: room-temperature cream cheese, properly whipped cream, and careful chilling.
I remember my niece’s face the first time she saw the red swirls — she insisted on a second slice before anyone else could get one. After several iterations I learned that the red food color is optional for aesthetics but essential if you want that classic candy-cane look. Small tweaks — like the brand of vanilla and the intensity of peppermint — made a big difference to my family’s reaction, and now they expect this pie every holiday season.
My favorite thing about this recipe is how reliably it creates that holiday moment — the pretty red streaks, the crunch of peppermint, and the first cool, creamy bite. Friends consistently tell me it tastes like a grown-up candy cane in pie form, and I love that it’s simple enough to make with kids helping to crush the candies and add the swirls.
Store the pie in the refrigerator, loosely covered with plastic wrap or in a pie container, for up to 3 to 4 days. For the cleanest slices, chill the pie overnight. If freezing, wrap the whole pie tightly in plastic wrap and a layer of foil or use an airtight container — freeze up to 2 months. Thaw slowly in the fridge for several hours or overnight; add fresh whipped topping and crushed peppermint after thawing to refresh texture and color.
For a lighter version, substitute half of the heavy cream with a stabilized whipped topping whipped to medium peaks, though texture will be slightly less rich. Use a gluten-free chocolate cookie crust in place of the Oreo crust for gluten-free diets. For a less sweet option, reduce powdered sugar to 1 cup and taste as you go; remember that reducing sugar will alter set and sweetness intensity. Mint intensity can be adjusted by reducing peppermint extract to 1/2 teaspoon if you prefer a subtler flavor.
Serve slices with a dollop of extra whipped topping, a sprinkle of crushed peppermint, and a drizzle of dark chocolate sauce for contrast. This dessert pairs beautifully with hot spiced cider or coffee and sits well at the end of a heavy holiday meal as a refreshing, minty finish. For a buffet, present on a cake stand with festive garnishes like whole candy canes and fresh cranberries for seasonal color.
In summer, omit the red color and use crushed Andes mints for a subtler mint-chocolate vibe. For a Valentine's twist, swap peppermint for raspberry extract and use pink swirls with crushed freeze-dried raspberries. At Christmas, add a layer of ganache between crust and filling for an elegant, richer slice. Small changes to garnish — crushed peppermint, edible glitter, or chocolate shavings — make this dessert adaptable to many holidays.
Make the filling up to 24 hours ahead and keep it refrigerated in an airtight bowl; fold in freshly whipped cream just before assembling for maximum lift. If hosting, assemble the pie the night before and top with whipped topping and candy just before serving to maintain crunch. Use individual tartlet shells for single-serve versions to streamline portioning at large gatherings.
At a recent holiday brunch my sister swapped out the crust for a peppermint bark base and declared it her new favorite; a neighbor gifted a jar of homemade crushed candies after trying the pie, and my niece began requesting it for every birthday. Guests often comment on the bright appearance and creamy texture — the recipe consistently converts peppermint skeptics into fans.
Every holiday I take joy in plating this pie and watching people reach for seconds. Whether you make it for a last-minute guests or plan it as a centerpiece dessert, it’s simple, festive, and full of heart — make it your own and enjoy the smiles it brings.
Use room-temperature cream cheese and a cold bowl for whipping cream to ensure smooth texture and maximum volume.
Fold whipped cream gently to preserve air — overmixing will deflate the filling and make it dense.
Chill the pie for at least 4 hours, preferably overnight, to allow the filling to set and flavors to meld.
Use gel food coloring for vivid swirls with less added liquid; add color slowly to control intensity.
This nourishing no-bake christmas peppermint pie recipe is sure to be a staple in your kitchen. Enjoy every moist, high protein slice — it is perfect for breakfast or as a wholesome snack any time.
Yes — the pie keeps well in the refrigerator for 3 to 4 days. For best slices, chill overnight before serving.
Freeze the pie tightly wrapped for up to 2 months. Thaw overnight in the refrigerator and refresh the topping before serving.
This No-Bake Christmas Peppermint Pie recipe makes perfectly juicy, tender, and flavorful steak every time! Serve with potatoes and a side salad for an unforgettable dinner in under 30 minutes.
Place a store-bought 9-inch Oreo crust on a flat surface. If making from scratch, pulse 36 Oreo cookies into fine crumbs, combine with 5 tablespoons melted butter, press into a 9-inch pie plate, and chill for 10 minutes to set before filling.
In a large bowl beat 16 ounces room-temperature cream cheese with 1.5 cups powdered sugar, 2 teaspoons vanilla extract, and 1 teaspoon peppermint extract until smooth and free of lumps, starting on low and finishing on medium speed.
In a cold bowl whip 1 cup heavy whipping cream to medium-stiff peaks, taking care not to overwhip. Cold tools and cream give the best volume.
Fold one-third of the whipped cream into the cream cheese base to lighten it, then fold in the rest gently. Stir in 1/2 cup crushed peppermint. Tint a small portion of filling with 10 drops red food color and swirl back into the main mixture to create red streaks without overmixing.
Spoon filling into the prepared crust, smooth the top, cover loosely, and chill at least 4 hours or overnight until firm. Before serving, spread thawed whipped topping and sprinkle extra crushed peppermint.
Last Step: Please leave a rating and comment letting us know how you liked this recipe! This helps our business to thrive and continue providing free, high-quality recipes for you.
Leave a comment & rating below or tag
@feedcooks on social media!

Turn classic crispy treats into creepily realistic Halloween brains—soft, glossy marshmallow centers bound to Rice Krispies, shaped and painted for maximum spooky impact.

A cozy, slow-cooked blend of tender chicken, crushed tomatoes, cream, and Parmesan—this Crock Pot creamy chicken parmesan soup is weeknight comfort made effortless.

Delicate baked cod fillets finished in a bright, silky coconut-lemon cream—an easy weeknight centerpiece that feels special enough for guests.
Leave a comment & rating below or tag @feedcooks on social media!
Enjoyed this recipe? Share it with friends and family, and don't forget to leave a review!
This recipe looks amazing! Can't wait to try it.
Comments are stored locally in your browser. Server comments are displayed alongside your local comments.

Join to receive our email series which contains a round-up of some of our quick and easy family favorite recipes.
