
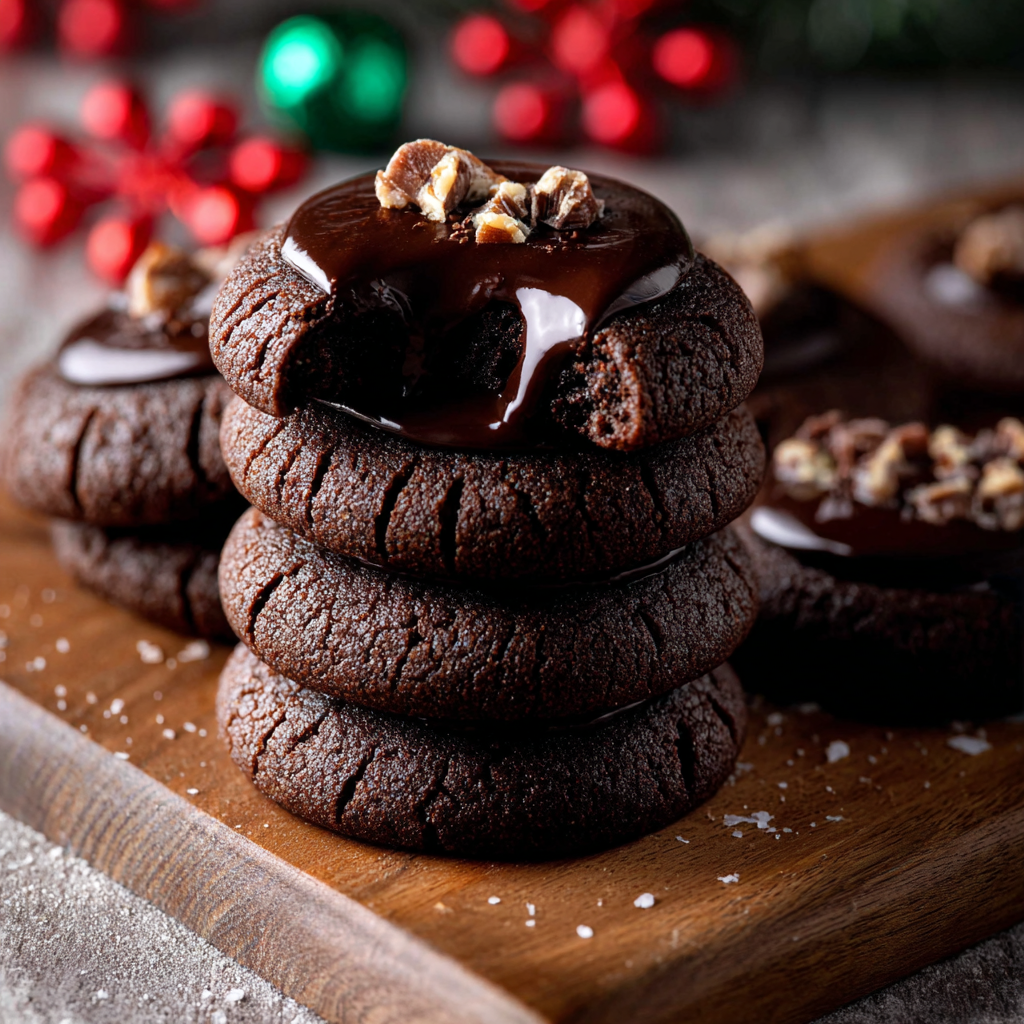
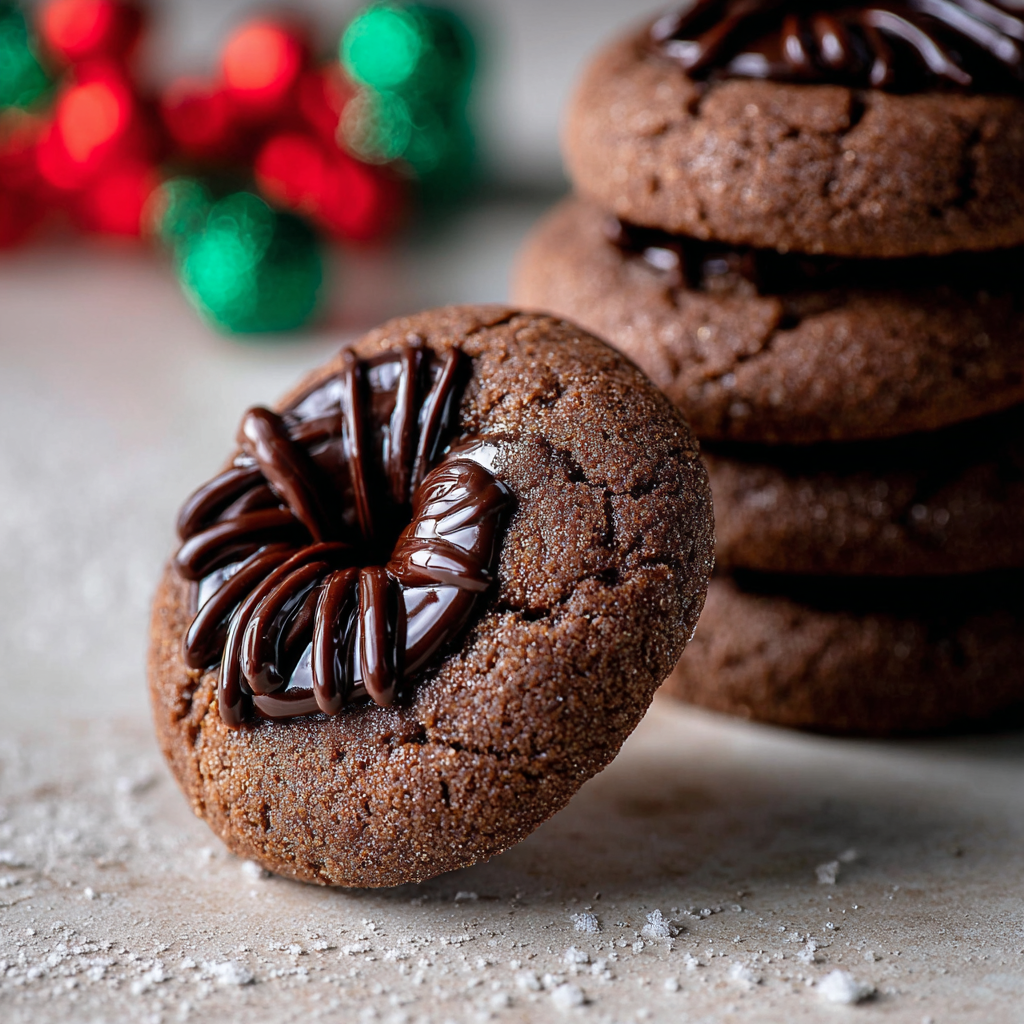
Chocolate Thumbprint Cookies

Soft, cocoa-spiked cookies filled with silky chocolate ganache and optional nonpareils for a festive finish — a small batch treat you’ll return to again and again.
This batch of chocolate thumbprint cookies has been my celebratory cookie of choice for everything from school bake sales to quiet Sunday afternoons. I first developed the formula during a rainy December when I wanted a cookie that felt both indulgent and approachable: cocoa in the dough for a tender, brownie-like crumb, browned-butter richness replaced here with plenty of vanilla and soft butter for creaminess, and a glossy ganache tucked into a neat thumbprint. The dough is buttery and dense enough to hold a clean indent but soft enough to yield a melt-in-the-mouth center once baked and filled. I remember my neighbor’s six-year-old declaring these the "best chocolate cookie ever" after sneaking two straight from the cooling rack.
This version focuses on technique as much as flavor. You’ll learn how to judge the dough by feel, how to form perfect indents that won’t spread shut, and how to make a ganache that sets silky but not rock hard. The recipe produces about 34 cookies — small enough to share easily yet large enough to keep some for yourself. Whether you want a make-ahead batch for a holiday platter or a last-minute treat for coffee, these cookies balance convenience with a decidedly special finish.
Why You'll Love This Recipe
- The dough comes together quickly using simple pantry ingredients and produces reliably uniform cookies every time, making it a great go-to for short-notice entertaining.
- The chocolate flavor is layered: Dutch-process cocoa in the dough gives deep, rounded cocoa notes while the ganache adds glossy, concentrated chocolate intensity.
- Make-ahead friendly — the formed, indented dough can chill for hours or freeze for long-term storage, so you can bake just what you need.
- Finishing with ganache keeps the centers soft and creates a neat presentation suitable for gifting or party platters.
- Simple variations allow allergy swaps or flavor twists—add espresso to intensify chocolate or swap sprinkles for chopped nuts to change the texture.
- Ready for the oven in about 20 minutes of active work, with a short bake and a brief set-up for the ganache — total hands-on time is modest.
My family always notices these on the table: the cookies disappear first at gatherings because they’re both familiar and a little fancy. Over the years I’ve learned to trust the visual cues — the dough should feel slightly tacky but not greasy, and the indents should remain defined after baking. These small observations make a big difference in the final texture.
Ingredients
- All-purpose flour (1 1/2 cups): Use spooned-and-leveled flour for accurate measurement. Bleached or unbleached both work; unbleached gives a slightly fuller wheat flavor. I like King Arthur for consistent results.
- Dutch-process cocoa powder (1/2 cup): Choose Dutch-process for a smoother, less acidic chocolate note that plays nicely with the ganache. Valrhona or Hershey's Special Dark are both good options.
- Leavening and salt (1/2 tsp baking powder, 1/2 tsp salt): These keep the cookies slightly tender without rising too much — baking powder gives a gentle lift while salt balances sweetness.
- Unsalted butter (3/4 cup): Softened, not melted. Butter temperature is critical: too warm and the dough will spread, too cold and it won’t cream properly. Use real butter for flavor.
- Brown sugar and granulated sugar (3/4 cup packed light brown, 1/4 cup white): Brown adds moisture and caramel notes; white helps with crisp edges and structure. Pack the brown sugar firmly when measuring.
- Egg yolks (2): Provide richness and tenderness. Reserve the whites for another use — they’re great in meringues or for egg wash.
- Vanilla bean paste or extract (1 1/2 tsp): Vanilla bean paste gives visible flecks and a bold vanilla presence, but good vanilla extract works equally well.
- Semi-sweet chocolate chips (1 cup) and heavy whipping cream (1/2 cup): For the ganache. Use a good-quality semi-sweet chocolate (about 60% cacao) for balance; avoid chocolate with stabilizers that won’t melt smoothly.
- Nonpareils (optional): Small, crunchy sprinkles lend color and texture; add immediately after piping the ganache so they adhere while the chocolate is still tacky.
Instructions
Prepare and line pans: Line two baking sheets with parchment paper and set aside. If you only have one sheet, plan to bake in batches. Preheat the oven to 325°F. Using parchment prevents sticking and helps cookies keep their shape. Combine dry ingredients: In a medium bowl whisk together 1 1/2 cups flour, 1/2 cup Dutch-process cocoa powder, 1/2 teaspoon salt, and 1/2 teaspoon baking powder until evenly distributed. This ensures even leavening and avoids cocoa clumps. Cream butter and sugars: In a large bowl, beat 3/4 cup softened unsalted butter with 3/4 cup packed light brown sugar and 1/4 cup granulated sugar using an electric mixer on medium speed for about two minutes. Scrape the bowl once; you want the mixture pale and aerated to trap tiny air pockets that give lightness. Add yolks and vanilla: Add 2 room-temperature egg yolks and 1 1/2 teaspoons vanilla bean paste or extract. Beat another 1–2 minutes until the mixture is paler and fluffy. The dough will look glossy; that sheen is a sign the sugar has dissolved into the butter. Incorporate dry ingredients: Mix the dry ingredients into the butter mixture on low speed, just until combined. Avoid overmixing — stop when no streaks of flour remain. Overworking can develop gluten and make cookies tough. Portion and shape: Scoop about 1 tablespoon of dough for each cookie — the recipe makes about 34 portions. Roll into smooth balls and transfer to the prepared baking sheets, spacing them about 1 1/2 inches apart. Create the thumbprints: Using a 1/4 teaspoon measure or the back of a small spoon, press down in the center of each dough ball to form an indent. The indent should be about 1/4 inch deep — deep enough to hold ganache but shallow enough that sides don’t cave in during baking. Chill before baking: Chill the prepared, indented dough balls for at least one hour. You can chill them all together on one sheet and divide across sheets before baking. Chilling firms the butter so cookies keep a neat shape and the indents remain defined. Bake: Arrange chilled cookies on baking sheets and bake at 325°F for 10–12 minutes, until the edges are set and the centers look slightly domed but not cracked. Watch closely—the cocoa masks golden coloration, so look for firm edges rather than color change. Cool on racks: Allow cookies to cool on the baking sheets for 5 minutes, then transfer to a wire rack to cool completely before filling. The cookies must be cool so the ganache sets properly without sliding off. Make the ganache: Heat 1/2 cup heavy whipping cream in a small saucepan over medium heat until it just begins to simmer and steam (do not boil). Pour over 1 cup semi-sweet chocolate chips in a heatproof bowl. Let sit for one minute, then stir until smooth and glossy. Fill and finish: Transfer ganache to a small piping bag or use a teaspoon to fill each indent. If using nonpareils, sprinkle them on immediately while ganache is still tacky. Let set at room temperature for about 30 minutes or refrigerate briefly to speed setting.
You Must Know
- Cookies freeze beautifully: unbaked, formed dough balls freeze up to 3 months; bake from frozen adding 1–2 minutes to the bake time.
- High in fat and moderate in sugar — enjoy in small portions; each cookie is rich and satisfying with a concentrated chocolate center.
- Store baked cookies in a single layer at room temperature for up to 3 days or refrigerated for up to 1 week; ganache may soften in warm conditions.
- Chocolate quality matters: using better chocolate in the ganache significantly improves mouthfeel and shine.
- Chilling is the most important step to preserve the thumbprint shape during baking.
My favorite part is watching the ganache transform from a glossy pour to a set jewel in the center of each cookie. Family and friends often ask for the recipe because the cookies look simple but taste deliberate — they’re small, handcrafted treats that feel special without requiring fancy techniques.
Storage Tips
Store finished cookies in an airtight container layered with parchment to prevent sticking; keep at room temperature for up to three days. For longer storage, freeze baked cookies in a single layer on a baking sheet until firm, then transfer to a labeled freezer bag for up to three months. If frozen, thaw in the refrigerator or at room temperature before serving. If you fill with ganache before freezing, wrap each cookie individually to protect the finish; otherwise, you can freeze unbaked, shaped dough and bake directly from frozen.
Ingredient Substitutions
If you need dairy-free options, substitute dairy-free butter and use a non-dairy heavy cream alternative for the ganache; note the ganache texture may be slightly less glossy. For a gluten-free adaptation, use a cup-for-cup gluten-free all-purpose flour blend with xanthan gum included; texture changes slightly but the cookie remains tender. To reduce sugar a touch, use a slightly less granulated sugar or a natural brown sugar substitute, but avoid removing too much sugar as it affects structure and spread.
Serving Suggestions
Serve these as a plated dessert with a dusting of cocoa or alongside a scoop of vanilla ice cream for contrast. They make an excellent addition to a cookie box or holiday platter, and the small size pairs well with coffee or tea. For celebrations, arrange on a tiered platter and alternate nonpareil colors. Consider pairing with salted caramel drizzles for a holiday variation or with fresh berries to cut through the richness.
Cultural Background
Thumbprint-style cookies have roots in European baking traditions where small, filled biscuits were common for special occasions. The idea of pressing an indent and filling it with jam or chocolate evolved over time and migrated into many regional variations. The chocolate thumbprint is a modern twist that pairs the classic format with a ganache center — an intersection of old-world cookie technique and contemporary confectionery.
Seasonal Adaptations
In winter, add 1/4 teaspoon ground cinnamon and a pinch of nutmeg to the dough and use holiday-colored nonpareils for festive flair. During summer, consider a ganache tinted with a spoonful of fruit puree reduced to concentrate flavor, or swap semi-sweet chocolate for white chocolate and top with finely grated citrus zest. For spring, fold finely chopped toasted almonds into the dough for a nutty counterpoint.
Meal Prep Tips
Form the dough and create the indents the day before baking; chill overnight so baking is quick and stress-free. Store formed dough in a single layer on a tray and cover tightly; when ready to bake, reposition across sheets and bake as directed. Make the ganache closer to serving to preserve shine; if preparing early, refrigerate and gently rewarm to soften before piping.
These cookies bridge every occasion — they’re cozy enough for family dessert and polished enough for parties. Give them a try, tweak a small detail to make them your own, and enjoy the ritual of pressing, filling, and sharing.
Pro Tips
Chill shaped dough at least one hour to prevent spreading and preserve the thumbprint.
Use room-temperature egg yolks so they emulsify easily into the creamed butter and sugar.
Heat cream only until steaming — boiling can separate fats and affect the ganache texture.
Press indents with the back of a 1/4 teaspoon for uniform depth; if they shrink during bake, press again while warm.
Measure flour by spooning into the cup and leveling to avoid a dry, dense cookie.
This nourishing chocolate thumbprint cookies recipe is sure to be a staple in your kitchen. Enjoy every moist, high protein slice — it is perfect for breakfast or as a wholesome snack any time.
FAQs about Recipes
Can I freeze the dough?
Yes. You can freeze the formed, indented dough balls for up to 3 months. Bake from frozen, adding 1–2 minutes to the bake time.
How long do filled cookies keep?
Room temperature for up to 3 days in an airtight container, refrigerate for up to 1 week. Ganache may soften if kept warm.
Why did my ganache become grainy?
Use high-quality chocolate with no stabilizers for best results. Reheat ganache gently to reflow if it firms too much.
Tags
Chocolate Thumbprint Cookies
This Chocolate Thumbprint Cookies recipe makes perfectly juicy, tender, and flavorful steak every time! Serve with potatoes and a side salad for an unforgettable dinner in under 30 minutes.
Ingredients
Cookies
Ganache
Instructions
Prepare and line pans
Line two baking sheets with parchment paper and preheat the oven to 325°F. Prepare enough space to cool baked cookies on wire racks.
Combine dry ingredients
Whisk together flour, Dutch-process cocoa, salt, and baking powder in a medium bowl to ensure even distribution of leavening and cocoa.
Cream butter and sugars
Beat softened butter with light brown sugar and granulated sugar for about two minutes until pale and aerated to trap air for a light texture.
Add yolks and vanilla
Incorporate the egg yolks and vanilla and mix until the mixture is pale and fluffy, about 1–2 minutes, which improves emulsion and texture.
Mix in dry ingredients
Fold the dry mixture into the butter mixture on low speed just until combined to avoid overdeveloping gluten and creating toughness.
Portion and indent
Scoop dough into 1-tablespoon portions, roll into balls, place on baking sheets, and press a 1/4 teaspoon indent into each center for filling.
Chill dough
Chill the prepared, indented dough for at least one hour to firm the butter and ensure the cookies hold their shape during baking.
Bake and cool
Bake at 325°F for 10–12 minutes until edges are set; cool on the baking sheet for 5 minutes then transfer to a wire rack to cool completely before filling.
Make ganache and fill
Heat cream until just simmering, pour over chocolate chips, let sit one minute, then whisk until smooth. Fill each cooled indent with ganache and let set.
Last Step: Please leave a rating and comment letting us know how you liked this recipe! This helps our business to thrive and continue providing free, high-quality recipes for you.
Nutrition
Did You Make This?
Leave a comment & rating below or tag
@feedcooks on social media!
Categories:
You might also like...

Marshmallow Rice Krispies Halloween Brains
Turn classic crispy treats into creepily realistic Halloween brains—soft, glossy marshmallow centers bound to Rice Krispies, shaped and painted for maximum spooky impact.

Crock Pot Creamy Chicken Parmesan Soup
A cozy, slow-cooked blend of tender chicken, crushed tomatoes, cream, and Parmesan—this Crock Pot creamy chicken parmesan soup is weeknight comfort made effortless.

Baked Cod in Coconut Lemon Cream Sauce
Delicate baked cod fillets finished in a bright, silky coconut-lemon cream—an easy weeknight centerpiece that feels special enough for guests.
Did You Make This?
Leave a comment & rating below or tag @feedcooks on social media!
Rate This Recipe
Share This Recipe
Enjoyed this recipe? Share it with friends and family, and don't forget to leave a review!
Comments (1)
This recipe looks amazing! Can't wait to try it.
Comments are stored locally in your browser. Server comments are displayed alongside your local comments.

Hi, I'm Lena!
What's Popular

30-Minute Meals!
Join to receive our email series which contains a round-up of some of our quick and easy family favorite recipes.