
Chocolate Gnome Cheesecakes

Mini chocolate cheesecakes transformed into whimsical gnomes — rich chocolate filling, crisp cookie crust, and playful ganache hats for a dessert that delights kids and adults alike.
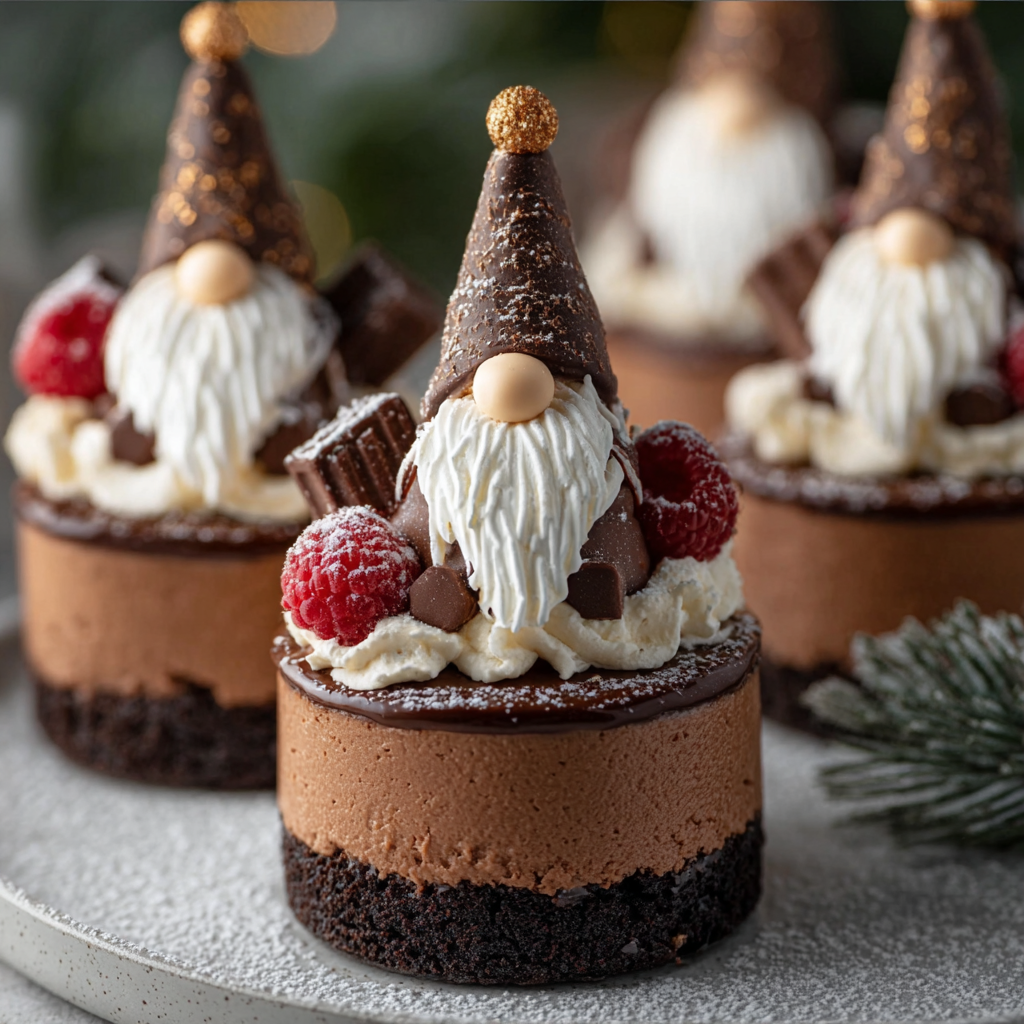
This batch of Chocolate Gnome Cheesecakes started as a playful experiment for a winter dessert table and quickly became a favorite at our house. I first made them one December when I wanted something small, chocolate-forward, and easy to hold during a bustling holiday party. The combination of a crisp chocolate cookie base, a silky chocolate-swirled filling, and a dollop of whipped cream for a snowy beard created tiny desserts that look like handmade ornaments and disappear fast.
What makes these treats special is how approachable they are: familiar ingredients, straightforward technique, and the ability to customize each gnome’s personality with different hats and noses. I remember my niece carefully arranging mini candy noses and declaring each gnome to have a unique name — they became more than food, they were part of the evening. Texture plays a big role here: a faint crunch from the crust, a creamy filling with a gentle chocolate ribbon, and a glossy ganache hat that snaps softly when you bite into it. These are perfect for parties, weeknight baking with kids, or as a small gift from the kitchen.
Why You'll Love This Recipe
- Mini portions make them party-friendly and perfect for portion control; the recipe yields about 12 small cheesecakes ready in under 2 hours including chilling.
- Uses pantry staples like chocolate cookies, cream cheese, and semi-sweet chocolate — no specialty shopping required.
- Decorating is fun and flexible: use ganache or melted chocolate for hats, whipped cream or buttercream for beards, and candies or white chips for noses.
- Make-ahead friendly — bake and chill up to 48 hours ahead, then finish decorations just before serving for the best appearance.
- Kid-friendly assembly provides an easy way to involve little helpers without dangerous equipment or hot oil.
- Works well for themed events: switch candy colors for holidays, or use strawberry hats for a fruity twist.
I discovered a few tricks the first time: using room-temperature cream cheese prevents lumps, and folding in melted chocolate gently preserves the filling’s silkiness. Family reactions were immediate — laughter and oohs — and the visual punch of tiny gnomes made the dessert table the most photographed spot that night.
Ingredients
- Chocolate cookie crumbs: 1 cup finely crushed chocolate sandwich cookies (Oreos without the filling work well). Look for a firm cookie like Nabisco Oreos or similar for a sturdy crust; pulse in a food processor for even crumbs.
- Unsalted butter: 3 tablespoons, melted. Use high-quality butter like Land O Lakes for flavor; it binds the crumbs and firms the crust when chilled.
- Cream cheese: 16 ounces (two 8-ounce blocks), softened to room temperature. Full-fat blocks give the best texture — Philadelphia brand is a reliable choice.
- Granulated sugar: 1/2 cup to balance the tang of the cheese without making the filling overly sweet.
- Sour cream or Greek yogurt: 1/2 cup. Sour cream adds tang and silkiness; plain full-fat Greek yogurt can be used for a slightly tangier profile.
- Vanilla extract: 1 teaspoon, pure vanilla for clean aroma. I recommend Nielsen-Massey or another pure extract.
- Large eggs: 2; room temperature eggs incorporate more evenly and help set the filling.
- Melted semi-sweet chocolate: 1/2 cup (about 3 ounces). Use a good baking chocolate such as Ghirardelli or chopped Hershey’s semi-sweet bars melted gently.
- Chocolate ganache: 3/4 cup for hats — make by heating 1/2 cup heavy cream and pouring over 3 ounces chopped semi-sweet chocolate, stir until smooth.
- Whipped cream or frosting: For beards — stabilized whipped cream or canned frosting both work; American buttercream holds up longer at room temperature.
- Mini candy-coated chocolates or white chocolate chips: For noses — use small candies like mini M&M’s or white chips for a snowy look.
- Strawberries or mini chocolate cones (optional): For hat shapes — halved strawberries add a fresh note, while tiny sugar cones give an edible cone hat.
- Powdered sugar: For a light dusting of “snow” before serving.
Instructions
Prepare the pan and crust: Preheat the oven to 325°F (163°C). Line a 12-cup muffin tin with paper liners or grease with nonstick spray. Combine 1 cup finely crushed chocolate cookies with 3 tablespoons melted butter in a bowl until it resembles wet sand. Press about 1 tablespoon of the crumb mixture into the bottom of each prepared cup to form an even crust layer. Bake for 6 minutes to set, then cool on a rack while you make the filling. Make the filling: With an electric mixer, beat 16 ounces softened cream cheese on medium speed until smooth, about 1-2 minutes, scraping down the bowl. Add 1/2 cup granulated sugar and beat until incorporated. Mix in 1/2 cup sour cream (or Greek yogurt) and 1 teaspoon vanilla. Add eggs one at a time, mixing on low until just combined to avoid introducing excess air. Fold in 1/2 cup melted semi-sweet chocolate with a rubber spatula in gentle strokes to create a marbled or fully chocolate filling depending on your preference. Portion and bake: Spoon or pipe the filling over the cooled crusts, filling each cup nearly to the top. Tap the pan gently on the counter to release air bubbles. Bake at 325°F for 15–18 minutes, until the centers are set but still slightly jiggly — edges may appear just set. Avoid overbaking, which causes cracks and a dry texture. Remove from oven and allow to cool on a rack for 30 minutes before chilling. Chill and set: Once at room temperature, transfer the tin to the refrigerator and chill for at least 2 hours, or overnight for best flavor and texture. Chilling firms the cheesecakes for easier decorating and clean slices. Prepare ganache and decorations: Warm 1/2 cup heavy cream until steaming and pour over 3 ounces chopped semi-sweet chocolate; let sit 1 minute then whisk until glossy. Cool slightly until thick enough to pipe or spoon. Fill a small piping bag or a resealable bag with whipped cream or frosting for beards. Keep mini candies and optional hat elements ready. Assemble the gnomes: Pipe a small dollop of whipped cream for the beard near the front center of each chilled cheesecake. Place a mini candy or white chip on top of the beard as the nose. Spoon or pipe a cone-shaped dab of ganache for the hat directly above the nose — if using strawberries or mini cones, place them as hats and drizzle ganache over to secure. Dust lightly with powdered sugar to mimic snow.
You Must Know
- These are best chilled for at least 2 hours; refrigeration improves texture and makes decorations easier to apply.
- Store in an airtight container in the refrigerator for up to 4 days — ganache hats and whipped beards stay fresh the longest when assembled shortly before serving.
- They freeze well: wrap individual cheesecakes and freeze up to 3 months. Thaw in the refrigerator overnight and finish decorations after thawing.
- High in fat and moderate in sugar — a small portion delivers a rich dessert experience; each mini is roughly 300–350 calories depending on toppings.
My favorite aspect is the playfulness of assembly: guests pick their favorite gnome and admire the tiny details. Family members have made a tradition of “naming” gnomes at parties — it’s become a conversation starter and a way to get everyone smiling before the coffee arrives. I recommend decorating right before serving to keep the whipped beards bright and the ganache glossy.

Storage Tips
Store leftover cheesecakes in a single layer in an airtight container in the refrigerator for up to 4 days. If stacking is necessary, place parchment or wax paper between layers to protect decorations. For longer storage, freeze assembled cheesecakes without light, perishable decorations (skip whipped cream beards). Wrap each in plastic wrap and place in a freezer-safe container for up to 3 months. To serve frozen portions, thaw in the refrigerator overnight and add fresh whipped cream and powdered sugar just before presenting.
Ingredient Substitutions
If you prefer a gluten-free version, swap the chocolate cookie crumbs for a certified gluten-free chocolate biscuit or crushed gluten-free sandwich cookies; remember to verify the brand. For a dairy-reduced option, use full-fat cream cheese alternatives like a high-quality plant-based cream cheese and coconut cream for the ganache, though texture will be slightly different. To cut sweetness, replace half the sugar with a powdered sugar substitute measured for baking, keeping in mind that texture and browning may change.
Serving Suggestions
Present these gnomes on a decorative platter dusted with powdered sugar for a snowy effect. Pair them with espresso, hot chocolate, or mulled wine depending on the season. For a brunch or tea service, add fresh berries and a small pot of whipped cream on the side. Garnish individual plates with a mint sprig or edible gold flakes for a festive touch. Their small size makes them ideal as part of a dessert sampler or a cookie-and-candy buffet.
Cultural Background
Mini cheesecakes trace their roots to classic European cheesecakes but have been adapted globally into single-serve formats. The gnome motif is inspired by Northern European folklore, where garden gnomes and tiny figures symbolize good luck and hospitality. Adapting desserts into playful characters is a modern culinary trend that mixes tradition with contemporary presentation — a nod to both nostalgia and Instagram-friendly plating.
Seasonal Adaptations
In summer, swap ganache hats for chilled strawberry halves and add a lime zest to the filling for brightness. For winter holidays, use red and green mini candies and sprinkle edible glitter on the hats. Around Halloween, tint whipped cream beards pale orange or use chocolate-dipped cone hats for a pumpkin-gnome mashup. Small ingredient swaps can shift the dessert’s tone without altering technique.
Meal Prep Tips
Make the crusts and baked cheesecakes up to 48 hours ahead, refrigerating them unadorned. Store ganache in a small sealed container at room temperature if you’ll use it within a day, or refrigerate and gently warm before use. Keep all assembly components organized in labeled bowls to speed decorating when guests arrive. For large events, set up a simple assembly station with piping bags, candies, and hats so multiple helpers can work simultaneously.
These tiny Chocolate Gnome Cheesecakes are as much about the experience as the flavor: they invite creativity, conversation, and a bit of whimsy at the table. Whether you make them for a holiday, a family gathering, or simply to bring a smile, they’re easy to personalize and reliably crowd-pleasing. Enjoy the process — and the inevitable requests for seconds.
Pro Tips
Always use room-temperature cream cheese to avoid lumps and ensure a silky filling.
Do not overbeat after adding eggs to prevent excess air and cracking; mix on low speed until just combined.
Chill cheesecakes for at least 2 hours for best texture; chilling overnight improves flavor.
For cleaner slices, warm a knife under hot water and wipe dry between cuts when serving plated portions.
This nourishing chocolate gnome cheesecakes recipe is sure to be a staple in your kitchen. Enjoy every moist, high protein slice — it is perfect for breakfast or as a wholesome snack any time.
Tags
Chocolate Gnome Cheesecakes
This Chocolate Gnome Cheesecakes recipe makes perfectly juicy, tender, and flavorful steak every time! Serve with potatoes and a side salad for an unforgettable dinner in under 30 minutes.
Ingredients
Crust
Filling
Decorations
Instructions
Prepare the crust
Preheat oven to 325°F. Line a 12-cup muffin tin with liners. Mix 1 cup cookie crumbs with 3 tbsp melted butter. Press about 1 tablespoon into each cup and bake 6 minutes. Cool while preparing filling.
Make the filling
Beat 16 oz softened cream cheese until smooth. Add 1/2 cup sugar, 1/2 cup sour cream, and 1 tsp vanilla. Add eggs one at a time on low speed. Fold in 1/2 cup melted semi-sweet chocolate gently to maintain creaminess.
Portion and bake
Spoon filling over crusts, tap to release air. Bake at 325°F for 15-18 minutes until centers are just set. Avoid overbaking. Cool on a rack 30 minutes, then chill at least 2 hours.
Prepare ganache and decorate
Heat 1/2 cup cream, pour over 3 oz chopped chocolate, stir until smooth. Cool slightly. Pipe whipped cream beards, place a candy nose, then add ganache hat or strawberry/cone. Dust with powdered sugar before serving.
Last Step: Please leave a rating and comment letting us know how you liked this recipe! This helps our business to thrive and continue providing free, high-quality recipes for you.
Nutrition
Did You Make This?
Leave a comment & rating below or tag
@feedcooks on social media!
Categories:
You might also like...

Marshmallow Rice Krispies Halloween Brains
Turn classic crispy treats into creepily realistic Halloween brains—soft, glossy marshmallow centers bound to Rice Krispies, shaped and painted for maximum spooky impact.

Crock Pot Creamy Chicken Parmesan Soup
A cozy, slow-cooked blend of tender chicken, crushed tomatoes, cream, and Parmesan—this Crock Pot creamy chicken parmesan soup is weeknight comfort made effortless.

Baked Cod in Coconut Lemon Cream Sauce
Delicate baked cod fillets finished in a bright, silky coconut-lemon cream—an easy weeknight centerpiece that feels special enough for guests.
Did You Make This?
Leave a comment & rating below or tag @feedcooks on social media!
Rate This Recipe
Share This Recipe
Enjoyed this recipe? Share it with friends and family, and don't forget to leave a review!
Comments (1)
This recipe looks amazing! Can't wait to try it.
Comments are stored locally in your browser. Server comments are displayed alongside your local comments.

Hi, I'm Lena!
What's Popular

30-Minute Meals!
Join to receive our email series which contains a round-up of some of our quick and easy family favorite recipes.