>>
30-MINUTE MEALS! Get the email series now →


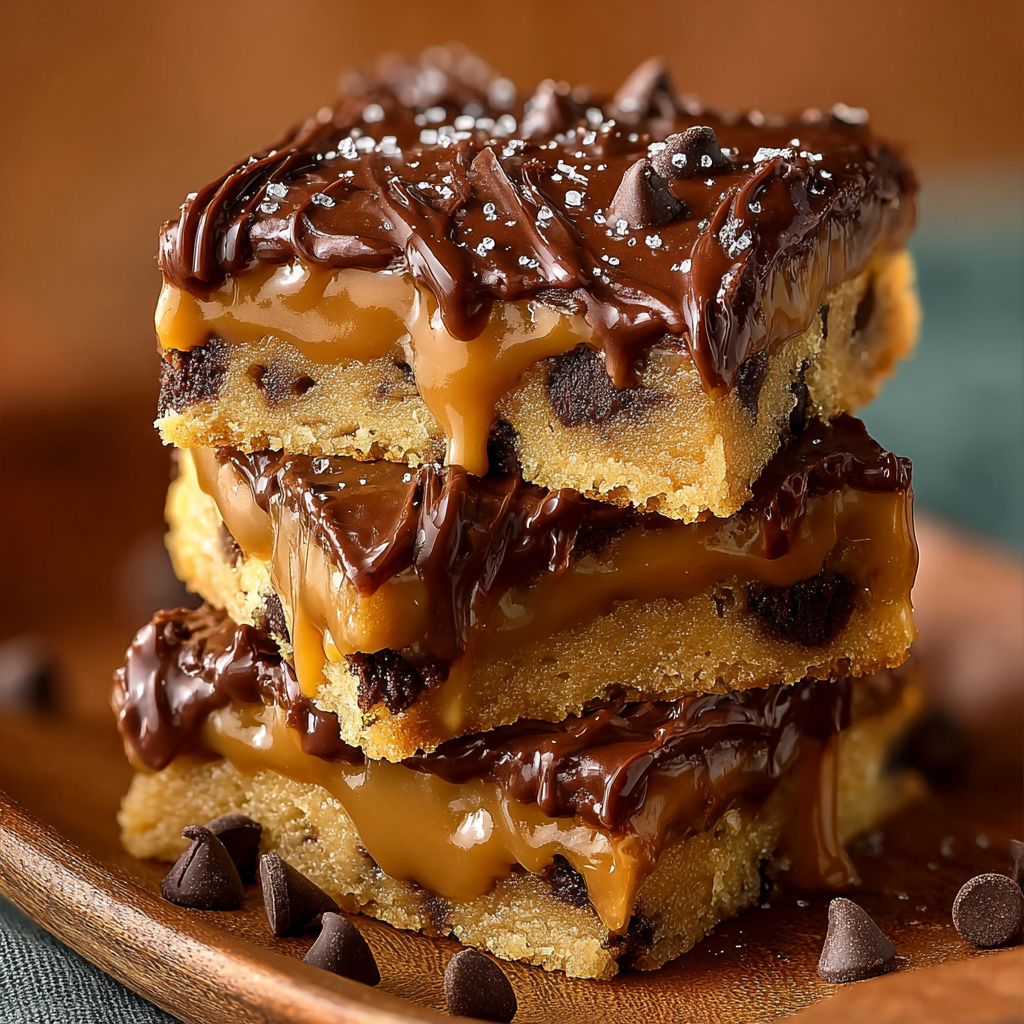
Chewy, buttery cookie bars layered with a ribbon of sticky caramel—an easy, crowd-pleasing dessert that combines pantry staples into something indulgent.

This caramel cookie bars recipe is one of those treats I pull out whenever friends drop by or when I want to impress without fuss. I first developed this version one rainy afternoon while craving something sweet but not wanting to fuss with individual cookies. The result was a thick, buttery bar with a tender, slightly chewy crumb and a ribbon of sticky caramel that cuts through the sweetness. It quickly became a favorite at family gatherings: people love being able to slice a generous square and enjoy the contrast between the soft dough and the gooey center.
I learned early on that the quality of a few simple ingredients makes all the difference. Good unsalted butter, the right balance of granulated and brown sugar, and a splash of real vanilla lift these bars from ordinary to memorable. Baking them in a 9 by 13 pan gives each piece a generous portion of dough and caramel; they cut well when cooled and the caramel is set. Expect golden edges, a tender middle, and a buttery aroma that fills the kitchen as they bake.
My family’s reaction the first time I served these was immediate: someone asked for the recipe and another asked for the plate. Over the years I refined the caramel quantity and timing so the center remains indulgent without turning into a mess; that balance is the magic here.
What I love most about this version is the nostalgic feel—like a caramel slice from the bakery but easier to make at home. I’ve served these at birthdays, coffee mornings, and holiday potlucks, and the response is always the same: they disappear quickly. Friends often ask for tips on how to make the caramel firmer or how to add chocolate; I include those variations below.

Store cooled bars in an airtight container at room temperature for up to 3 days. For longer storage, refrigerate for up to one week or freeze individual squares separated with parchment for up to three months. To reheat, warm in a preheated 300 degrees Fahrenheit oven for 6 to 8 minutes to restore tenderness, or microwave briefly in 10 second bursts if you prefer gooey warm caramel. Use tight-fitting lids or double-wrap with plastic to avoid moisture loss and maintain texture.
To make a nutty variation, fold in 1 cup toasted chopped pecans into the dough. For a chocolate caramel twist, sprinkle 1 cup of semi-sweet chocolate chips over the caramel before adding the top dough. To reduce sweetness, use slightly less granulated sugar and a darker caramel; note texture changes when swapping sugars. For a dairy-free option, use vegan butter and a dairy-free caramel sauce, but expect a slightly different mouthfeel and firmer set.
Serve bars slightly warm with a dollop of whipped cream or a scoop of vanilla ice cream for dessert. For coffee service, plate smaller 2 by 2 inch squares and garnish with a tiny pinch of flaky sea salt. These bars are excellent on dessert platters alongside brownies and blondies and pair beautifully with black coffee or a medium-bodied tea.
Bars made of cookie-like dough and layered fillings are a staple in many baking traditions. This layered caramel bar owes its inspiration to classic American tray bakes and European caramel slices. Over time, home bakers have adapted the format to use readily available caramels and simpler assembly techniques, making these bars a modern comfort-food hybrid suitable for casual gatherings.
In autumn, add 1 teaspoon ground cinnamon and 1/4 teaspoon ground nutmeg to the dough and swap the caramel for a salted pumpkin caramel. For holiday gatherings, scatter chopped cranberries and pistachios over the caramel for a festive look. In summer, serve chilled with a bright citrus whipped cream to cut through the richness.
Prepare the dough a day ahead and refrigerate. When ready to bake, press half into the pan, add caramel, top with remaining dough, and bake as directed. Alternatively, freeze the unbaked slab for up to one month; thaw in the refrigerator overnight before baking. This makes assembly ahead ideal for busy schedules and events.
One of my favorite memories with this recipe was at a neighborhood block party where I brought a tray and returned to find an empty pan and neighbors swapping secrets about where I buy my caramel. A friend who claimed to dislike sweets ended up asking for a second piece. Baking these bars for a college care package was another hit—packed alongside snacks, they were a homey reminder of family and comfort.
Whether you bake them for casual afternoons, special occasions, or a simple weeknight treat, these caramel cookie bars reward minimal effort with maximum satisfaction. I encourage you to make them your own and share the results with friends and family.
Use room temperature eggs and butter to help ingredients incorporate evenly and avoid overworking the dough.
Allow the bars to cool completely before slicing to prevent the caramel from running and ensure clean squares.
If the caramel is too thick to spread, warm it gently in the microwave for 15 to 30 seconds and stir until pourable.
This nourishing caramel cookie bars recipe is sure to be a staple in your kitchen. Enjoy every moist, high protein slice — it is perfect for breakfast or as a wholesome snack any time.
This Caramel Cookie Bars recipe makes perfectly juicy, tender, and flavorful steak every time! Serve with potatoes and a side salad for an unforgettable dinner in under 30 minutes.
Preheat oven to 350 degrees Fahrenheit. Line a 9 by 13 inch pan with parchment paper and lightly grease.
Beat butter with granulated and brown sugar until light and slightly fluffy. Alternatively, melt the butter and combine with sugar for a denser texture.
Add eggs one at a time, mixing after each addition. Stir in vanilla, scraping the bowl as needed to blend.
Whisk flour, baking soda, and salt together, then add to wet ingredients in two additions and mix until just combined to avoid overworking.
Press half the dough into the pan evenly. Warm 1 cup caramel sauce until pourable and spread over the base, leaving a small border.
Crumble or press remaining dough over caramel and bake at 350 degrees Fahrenheit for 20 to 28 minutes until edges are golden and center set.
Cool completely in the pan for at least one hour, lift out with parchment, and slice into 12 squares. Optionally sprinkle with flaky sea salt.
Last Step: Please leave a rating and comment letting us know how you liked this recipe! This helps our business to thrive and continue providing free, high-quality recipes for you.
Leave a comment & rating below or tag
@feedcooks on social media!

Turn classic crispy treats into creepily realistic Halloween brains—soft, glossy marshmallow centers bound to Rice Krispies, shaped and painted for maximum spooky impact.

A cozy, slow-cooked blend of tender chicken, crushed tomatoes, cream, and Parmesan—this Crock Pot creamy chicken parmesan soup is weeknight comfort made effortless.

Delicate baked cod fillets finished in a bright, silky coconut-lemon cream—an easy weeknight centerpiece that feels special enough for guests.
Leave a comment & rating below or tag @feedcooks on social media!
Enjoyed this recipe? Share it with friends and family, and don't forget to leave a review!
This recipe looks amazing! Can't wait to try it.
Comments are stored locally in your browser. Server comments are displayed alongside your local comments.

Join to receive our email series which contains a round-up of some of our quick and easy family favorite recipes.
